Choose a structure for your school
Start with one group named after your school, such as Northside School. This gives the owner and administrators one place to manage members, check editing access and view students’ group posters.
Teachers can lead communities such as Year 7 Science or History projects. A student can join several communities in the same group. Communities are optional: you can start with the school group alone.
Use separate groups when schools or teaching spaces need separate membership and administration. One Group subscription can fund several groups owned by the same person.
Decide who does what
- Owner: manages the school group and the subscription that funds it.
- Admin: manages members, communities and editing access across the school group. Owners and admins can view private group posters.
- Mentor: leads communities and can view private posters from members of those communities. Use this role for teachers who lead classes or projects.
- Student: creates posters and takes part in school communities with a student account.
Choose Admin for teachers who need to manage members across the school. Choose Mentor for teachers who work through their own communities. Visibility does not give staff permission to edit or delete another person’s posters. Existing viewing passwords still apply.
Buy a Group licence
Open pricing, choose Group, then select the billing period and number of seats. Follow the checkout instructions with the account that will own the school subscription.
A seat gives a member editing access. Include teachers and students who need editing access when you choose the quantity. The subscription owner has editing access in addition to the purchased seats.
A person uses at most one seat across groups funded by the same subscription. Pending invitations use no seats. A member’s personal licence does not replace a group seat.

Choose Group and set the number of managed seats. The price and currency shown are examples; check your own checkout.
Create an EDU group
Open My groups and choose Create group. Enter your school name and select School (EDU) as the group type. The group type cannot be changed after creation. EDU groups support the Student role and its school account rules.
Choose the Group subscription and set the editing-seat allowance for this group. If the allowance needs more seats than are available, review the seat increase and complete payment.
Create the group, then check its name, type and editing-seat allowance before inviting students.
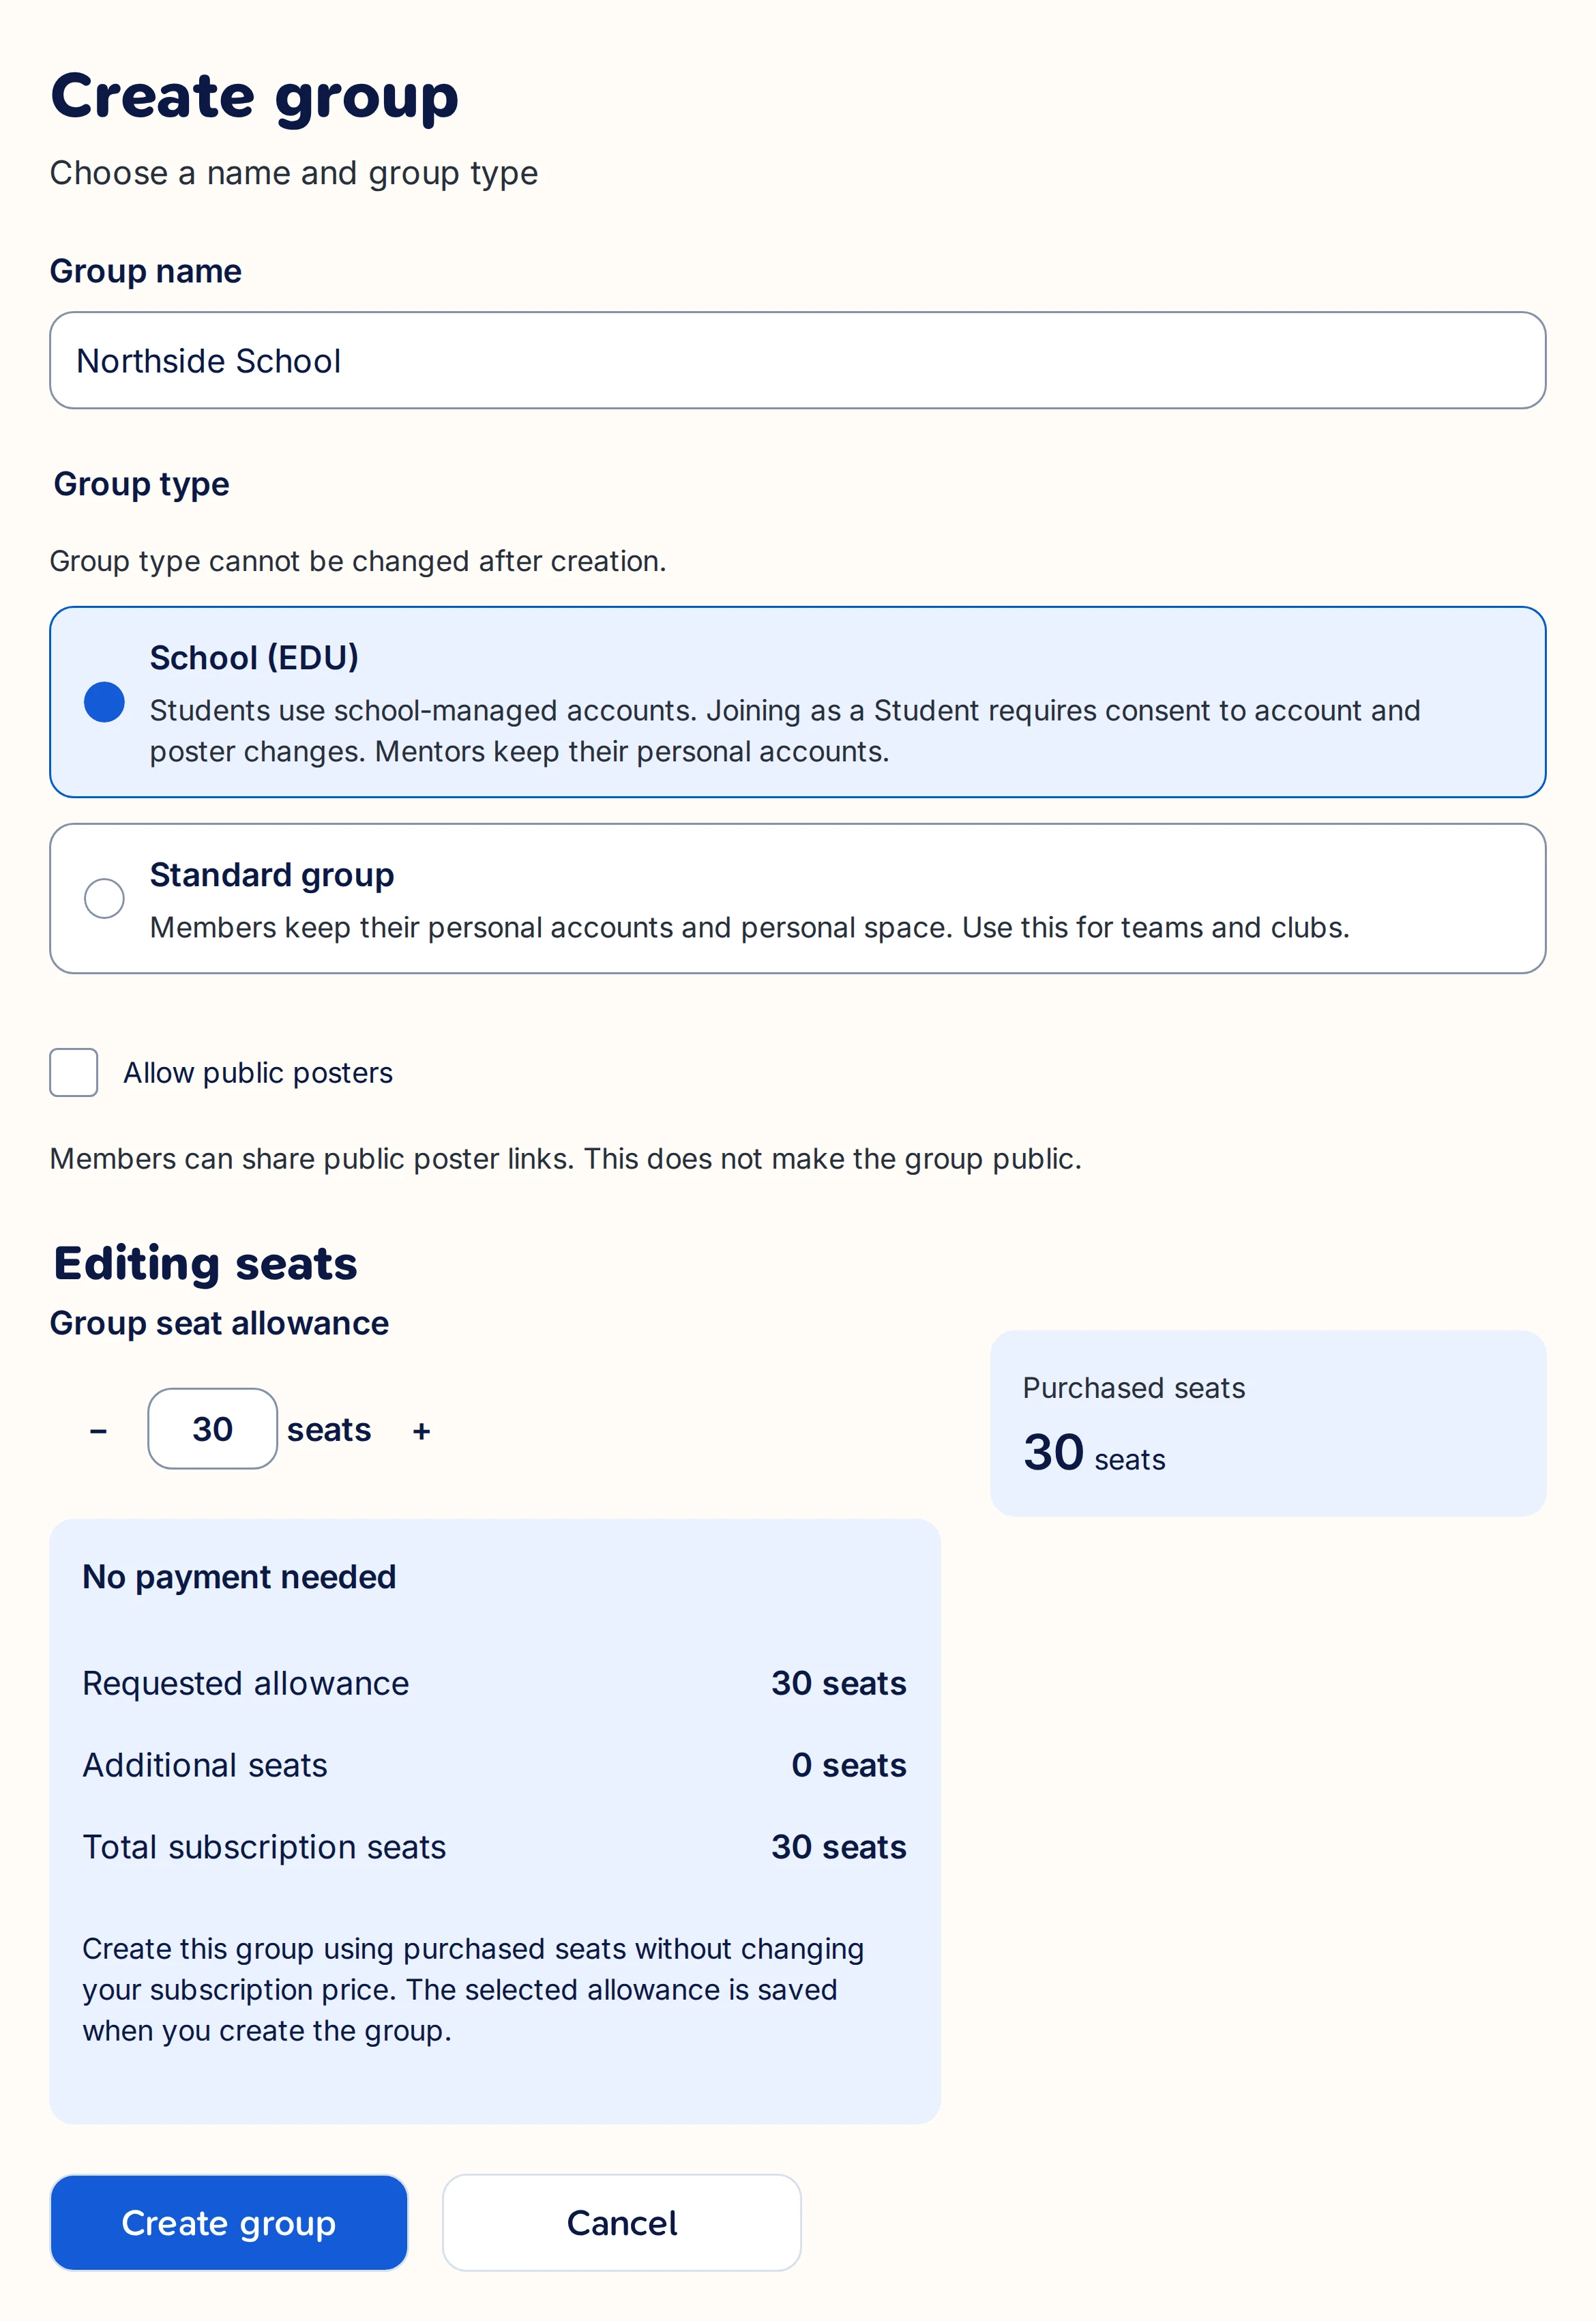
Select School (EDU) and set the editing-seat allowance before creating the group.
Invite teachers first
As the owner, open the group’s invitations and invite teachers by email. Choose Admin or Mentor for each teacher. Only the owner can invite an Admin.
Teachers should accept with the account that matches the invited email address. Keep teacher invitations separate from the student invitation code: people who use the EDU group code join as Students.
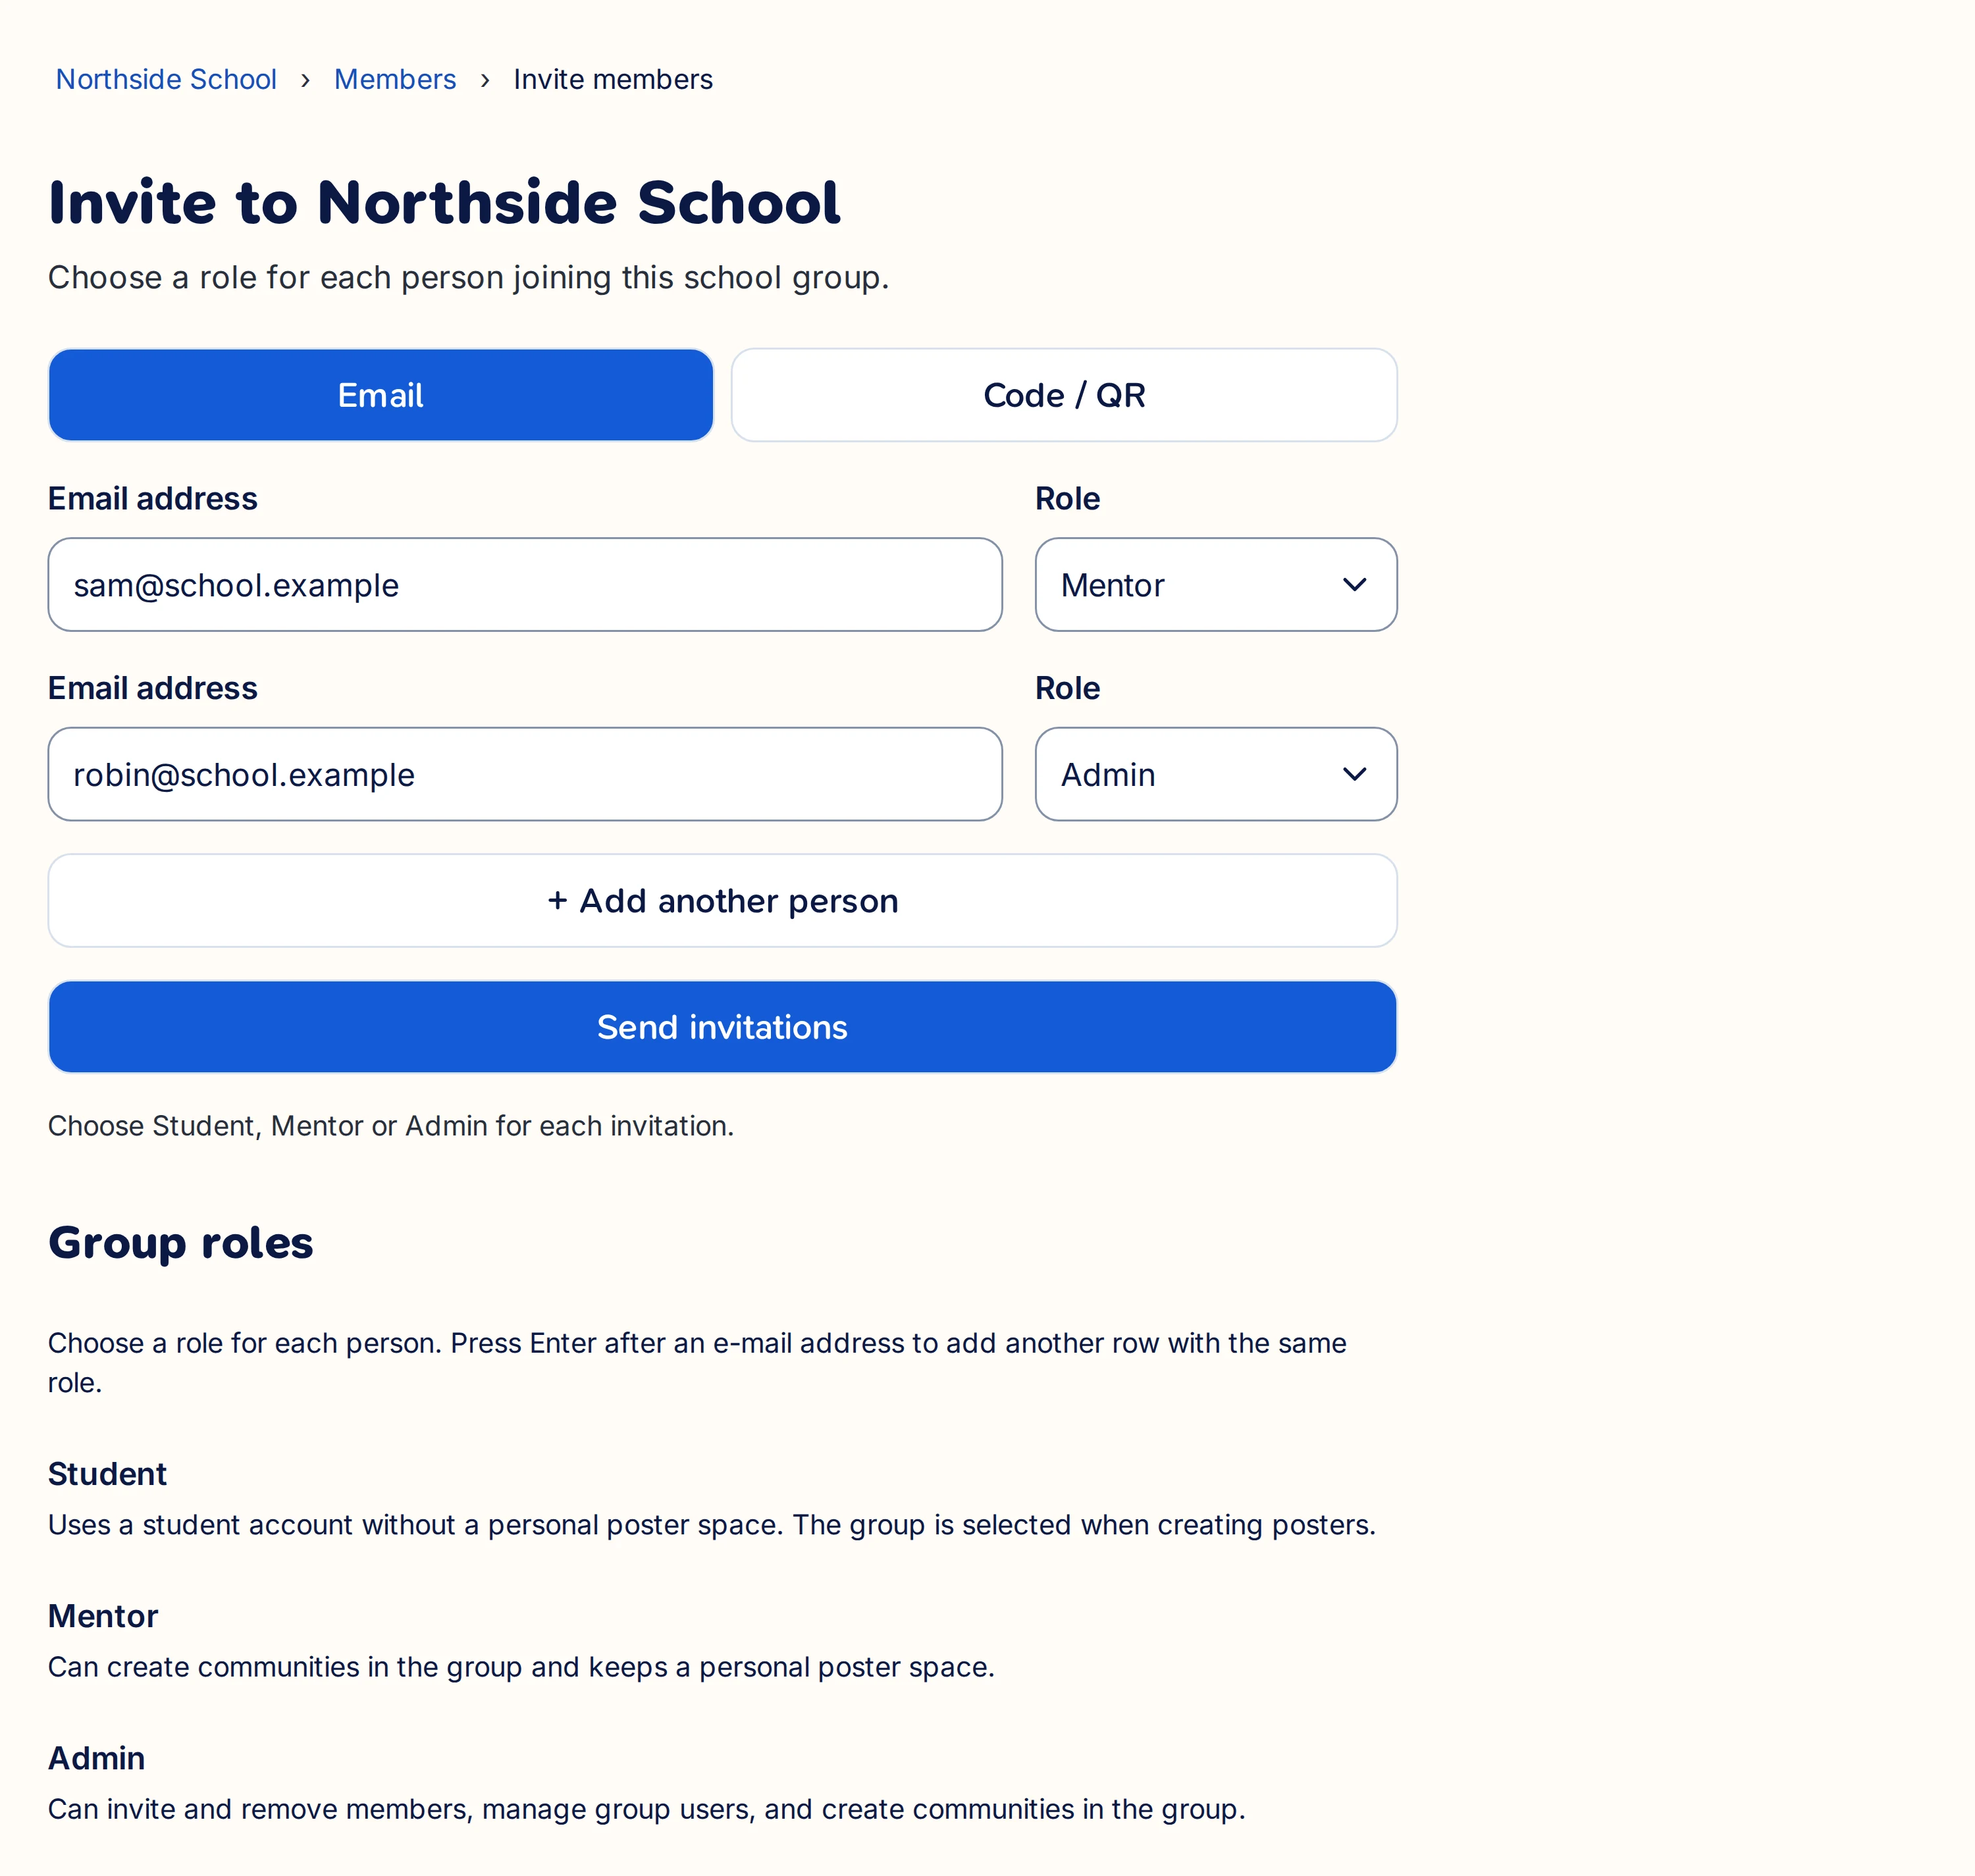
Invite teachers by email. Choose Mentor for class teaching or Admin for school-wide member management.
Invite students with a QR code
Open the group’s invitations and select Code / QR. Create a code if the group does not have one. Display the QR code in class so students can scan it and open the invitation.
Share the invitation link or the typed code with students who cannot scan the QR code. Share the code only with the intended students: it is a shared invitation, not an invitation restricted to one email address.
Students who need an account should create it from the invitation. Students who already have an account should sign in and read Join your school with an existing account before accepting. Joining as a Student can change their whole account and all active posters.
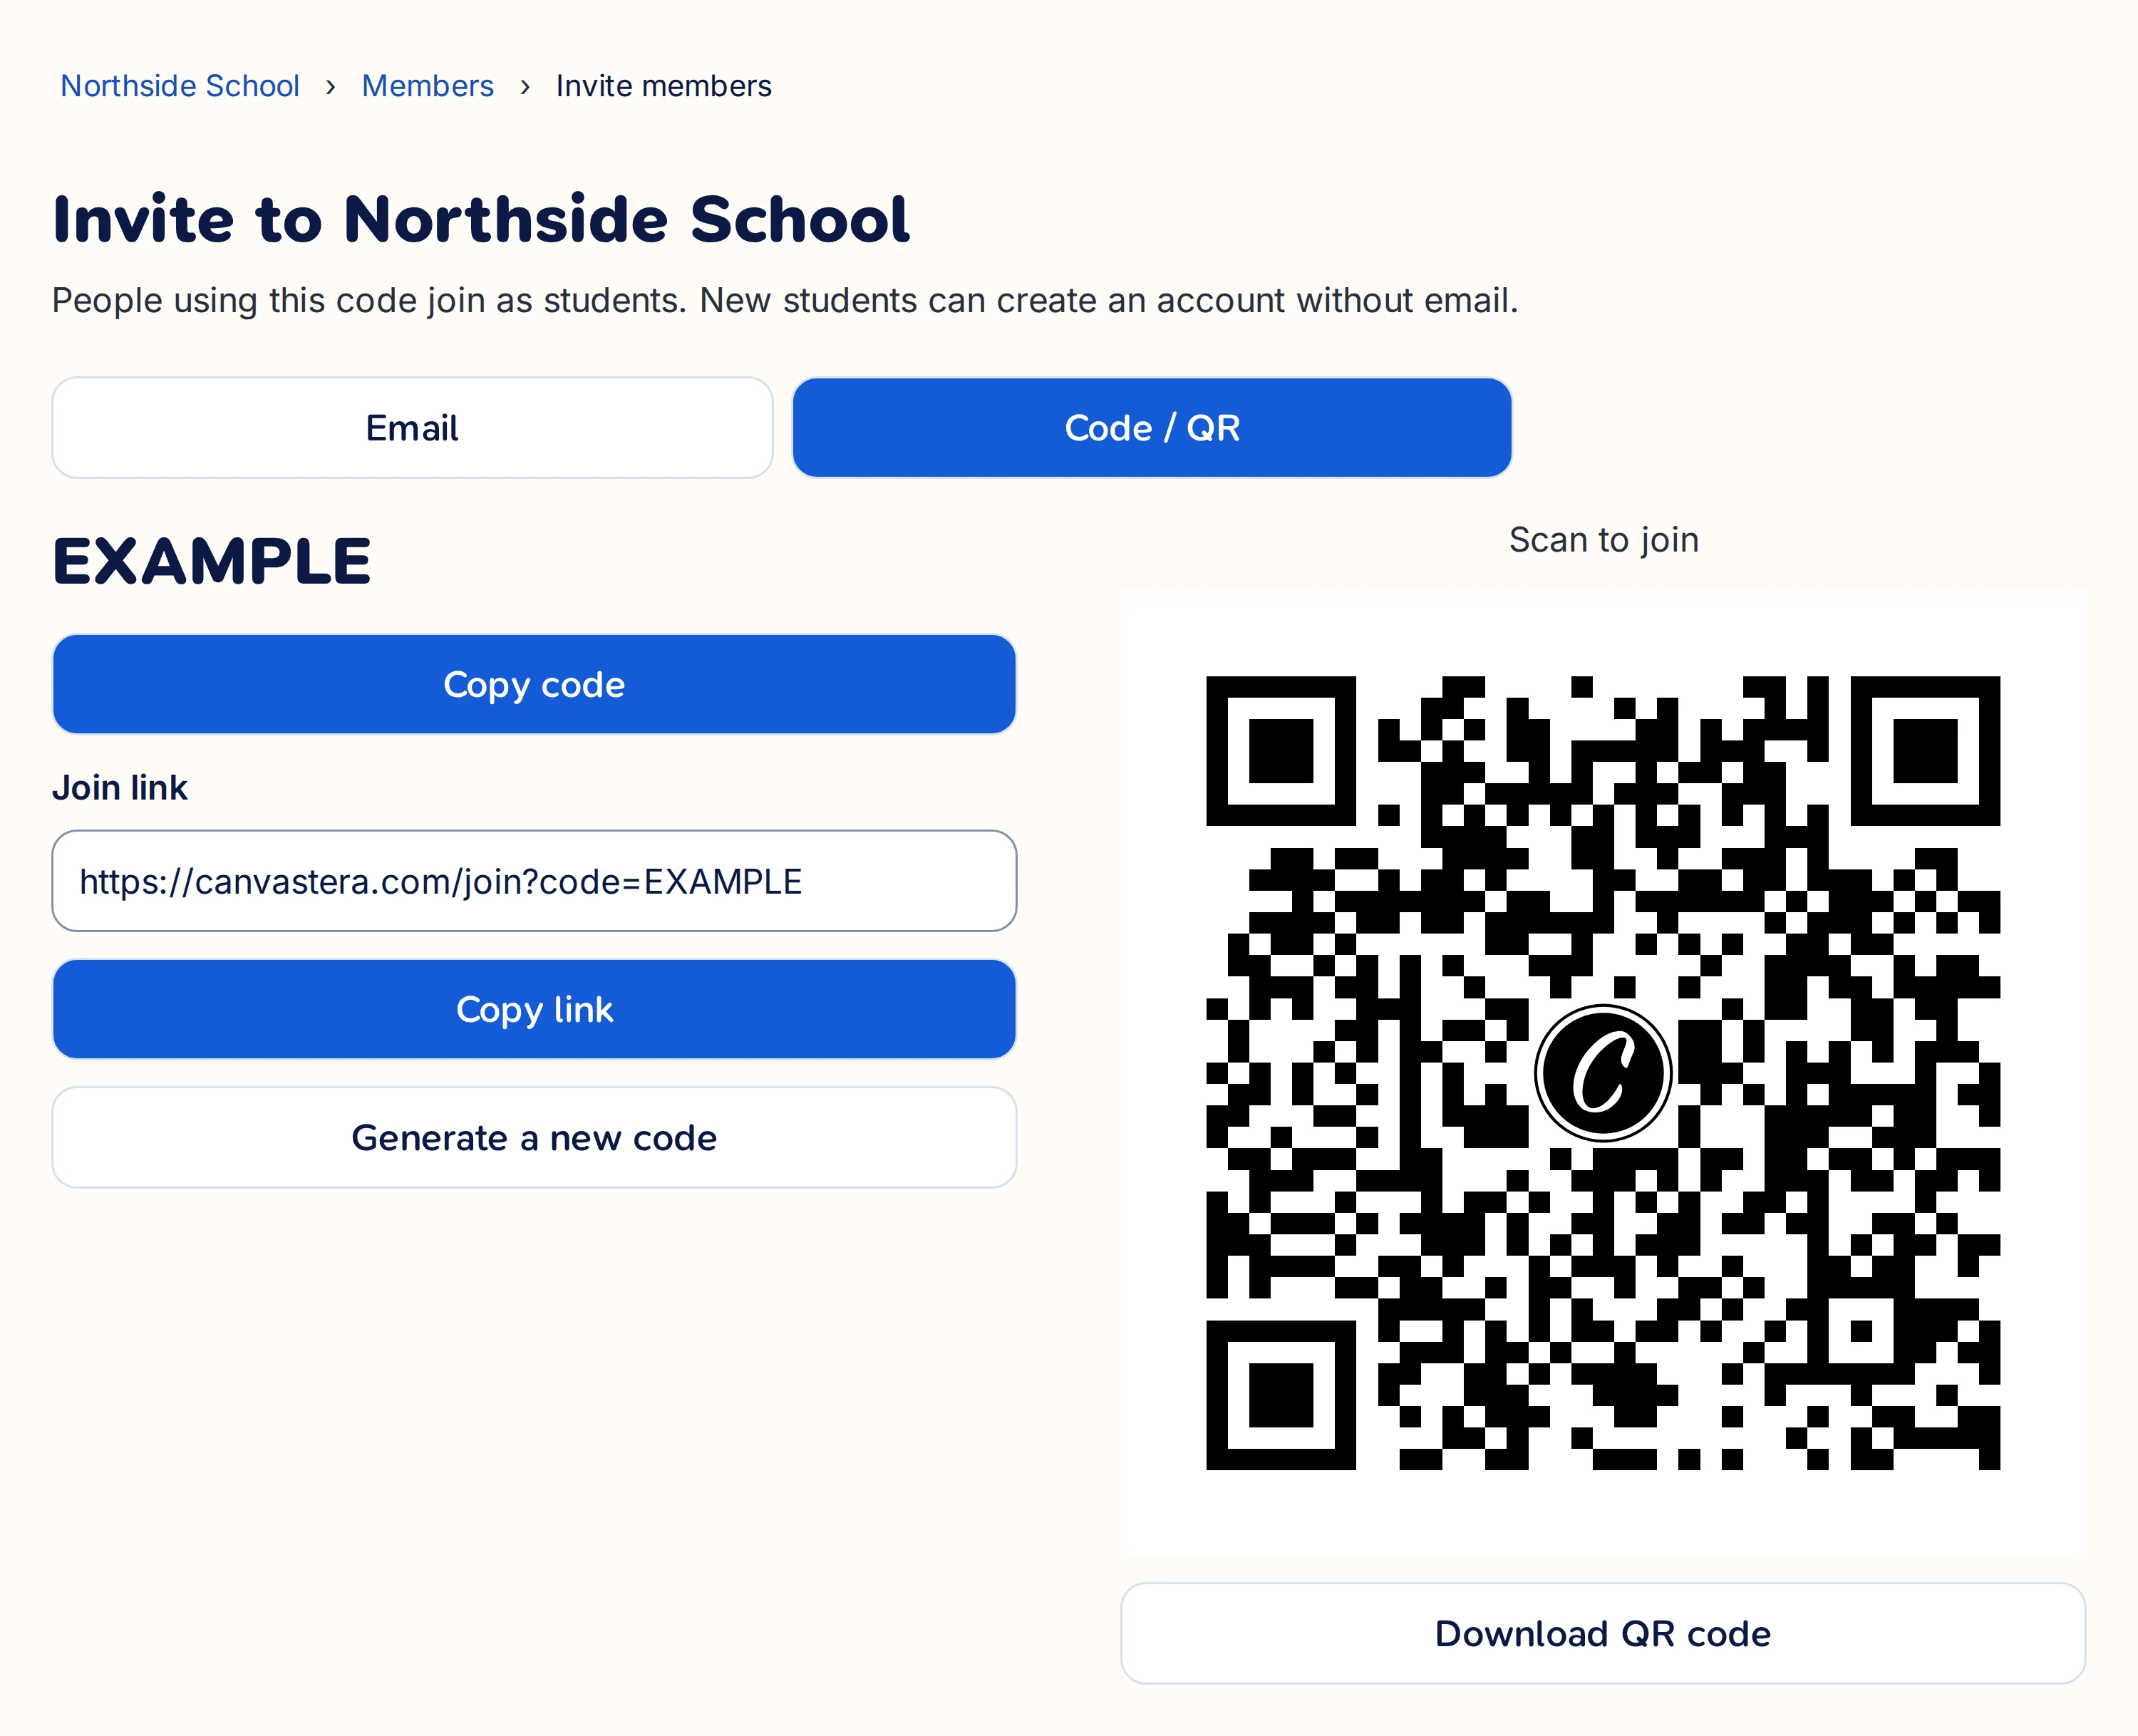
Open Code / QR to share your own student invitation. This screenshot uses an example code.
Create class communities if needed
Create a community inside the school group. Give it a clear name, such as Year 7 Science. Teachers with the Mentor role can lead their communities and invite students through them.
Choose the visibility that fits the class:
- Open: group members can find, open and join the community themselves. Students already in the school group do not need another invitation. People outside the group cannot access it.
- Private: use invitations for selected participants. The group owner and admins can also access the community.
- Public: group members can join directly. Signed-in people outside the group can view public posters through a shared link.
Open is a useful choice when any student in the school group should be able to join a class or project. It does not make the community public on the internet.
A community invitation can also bring a new student into the school group. They must review and accept the school invitation rules. Create school communities inside the group from the start; an existing standalone community cannot be moved into it.
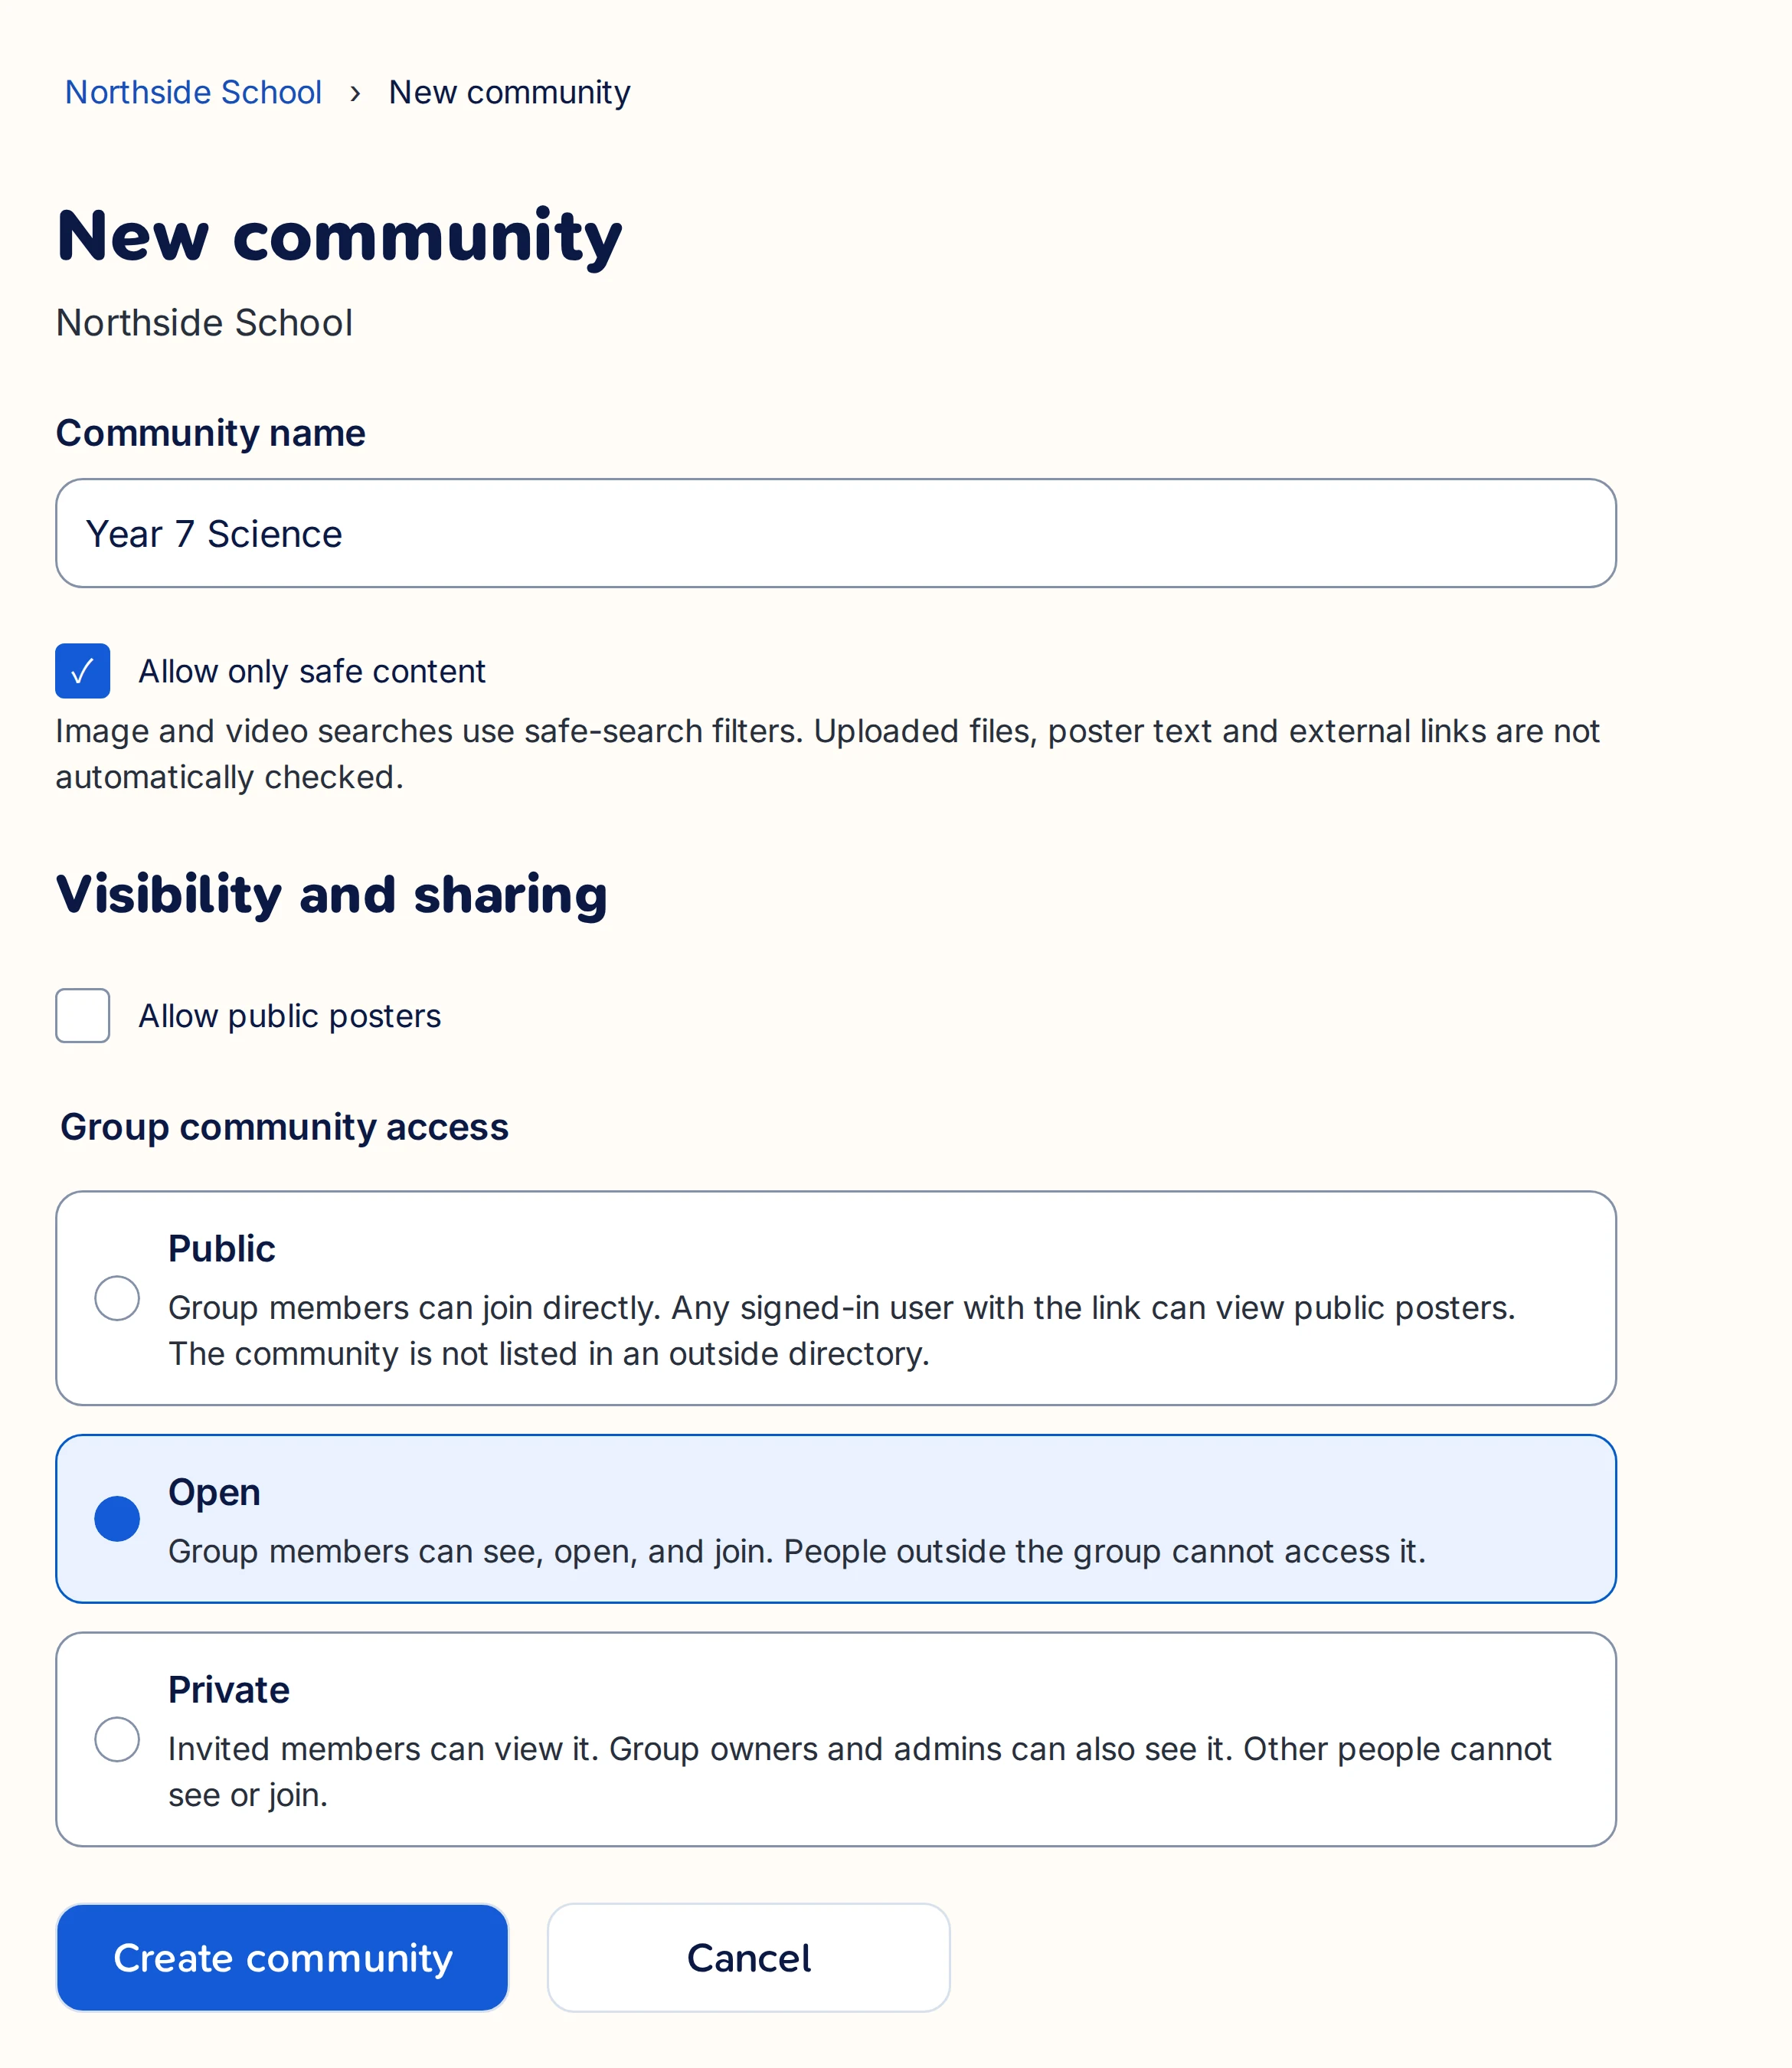
Choose Open so students already in your school group can join without another invitation.
Check that everyone can start
Open the member list. Check that teachers have the intended roles and students have joined. Check editing access as well as membership: joining does not guarantee a seat when the group’s allowance is full.
If someone is waiting for a licence, review the group’s allowance and seat priority. A member’s role does not set their seat priority. Review the effect on other members before you change it.
Ask a student to open their class community, create a poster and save it. If school email or network filters block a step, send Prepare your school network for Canvastera to your IT team.
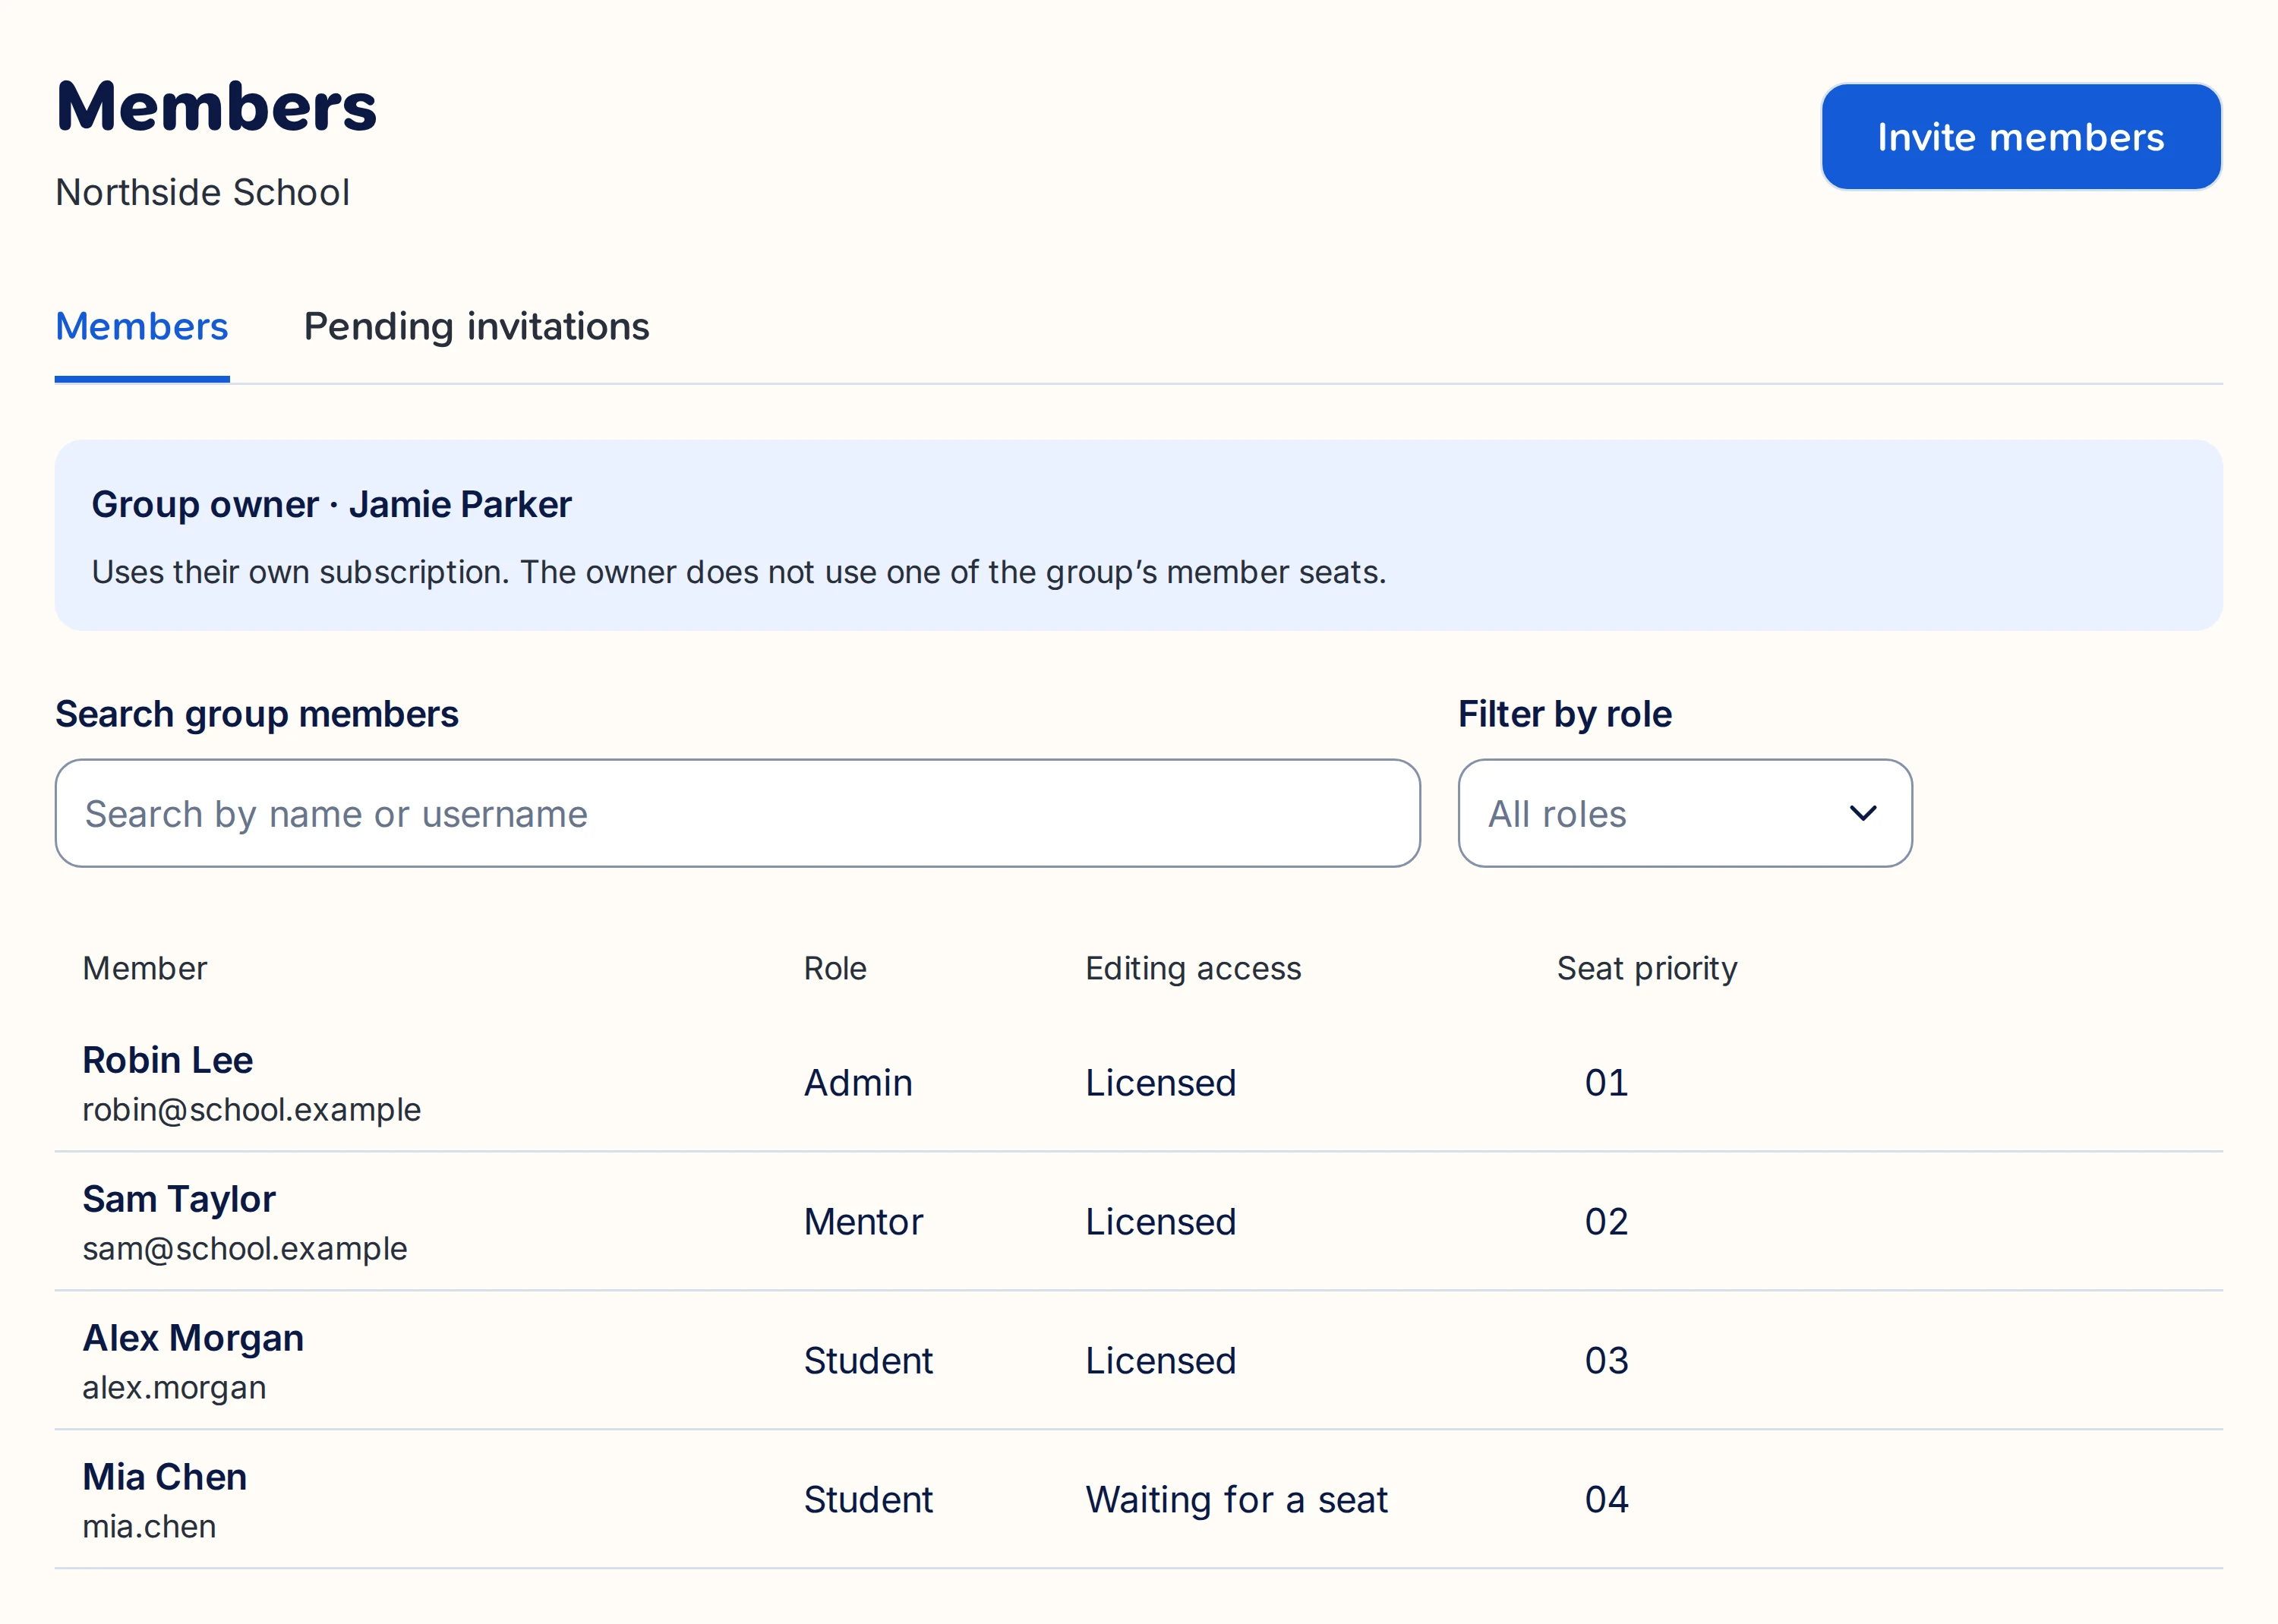
Check roles and editing access separately. A student can join while waiting for an editing seat.